Who hasn’t wanted to build their own robot? Admit it. You’ve yearned to create one at some point in time: to water your garden, do your chores, or perhaps even do your homework! With an Arduino board (or multiple), you’re one step closer to achieving those seemingly far-fetched goals.
What is Arduino?
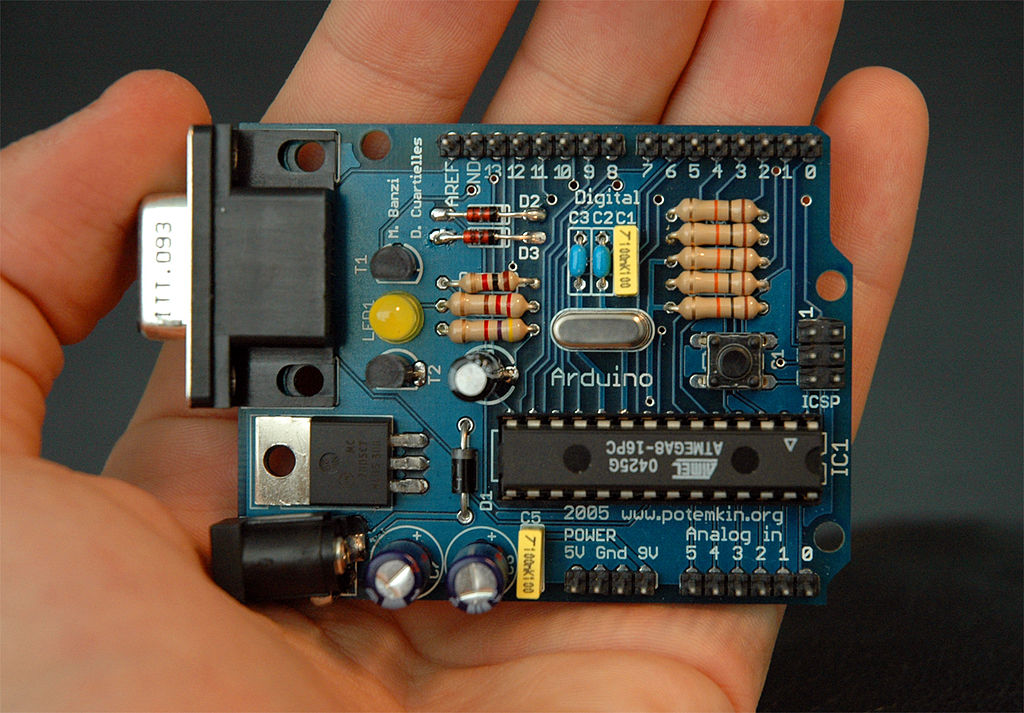
Arduino is a microcontroller company that open sources its hardware and software, allowing users to create and share projects. Its user-orientated interface makes it quick and simple to learn. Furthermore, since everything is open-sourced, anyone can manufacture their own Arduinos. You might still be wondering what exactly a microcontroller is. Well, wonder no longer! A microcontroller is a computer chip that has only one integrated circuit. With Arduino and some basic code, anybody can program their very own robot.
The two parts to any project are the hardware (wiring, components), and software (sketches). Components of every Arduino board are input/output pins, and a port (often USB) to load programs onto. Additionally, the input/output pins can either be digital or analog. This means that variables can exist in two states exclusively – on or off (digital), or in between states (analog). For example: digital output is useful if you’re trying to turn an LED on or off. Meanwhile, analog is better suited to controlling a servo motor, or various sensors. As for the software programs used, Arduinos typically use C or C++. Programs written for Arduino are called “sketches”, which can be shared.
Components: personalize your projects
In addition to the Arduino itself, you’ll need some basic components to begin your project. These include: actuators, connectors, LEDs, sensors, shields, and LCDs. Actuators are output components that move or control systems, such as motors or valves. Likewise, the main input components are sensors. These provide the Arduino with information about its environment. There are many types of sensors, such as supersonic, temperature, humidity, light, or motion (accelerometers). You can even build a DIY breathalyzer with an alcohol sensor – disclaimer: underage drinking is BAD. LEDs and LCDs are used as output sources. Shields, such as breadboards, allow for expansion of the circuit, as well as easy prototyping. Lastly, connectors (wires, male to male, male to female, etc.) help join the whole circuit together.
Begin your project today
Armed with this basic intro to Arduino, you’re all set to start your own project. A wide variety of tutorials are available online, especially on YouTube. Suitable for both beginner and intermediate makers, Arduino is a great tool to make your ideas happen. Unleash your creativity today!
Leave a Reply